- Particles
Marcel Hopfe; M. Sc. Physik
Detect and control particle contamination in cleanrooms
Anyone who controls particles in cleanrooms is familiar with ISO 14644. The best-known part is ISO 14644-1, which is relevant for classification. Far less well known is part -9, which deals with particles on surfaces. It deals with the surfaces of walls, ceilings, floors, work areas, tools and products. This ISO part contains eight SCP classes (surface cleanliness by particle concentration).
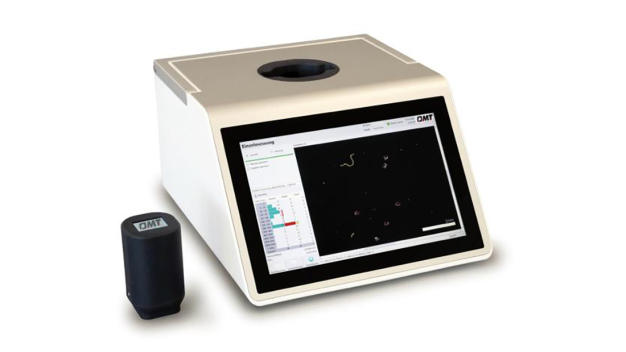
Particles from approx. 2 μm can be measured with the PartSens 4.0 and thus SCP classes 4 - 8 can be tested. As a supplier to the semiconductor industry, tests were carried out on the surface cleanliness in a clean room that complies with class 7 according to ISO 14644-1.
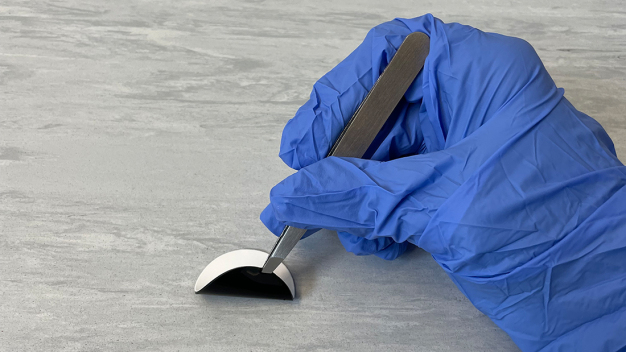
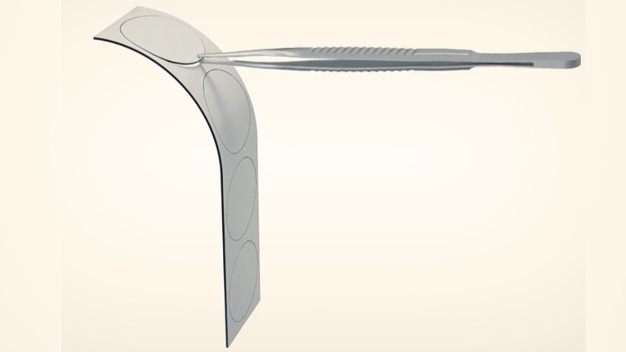
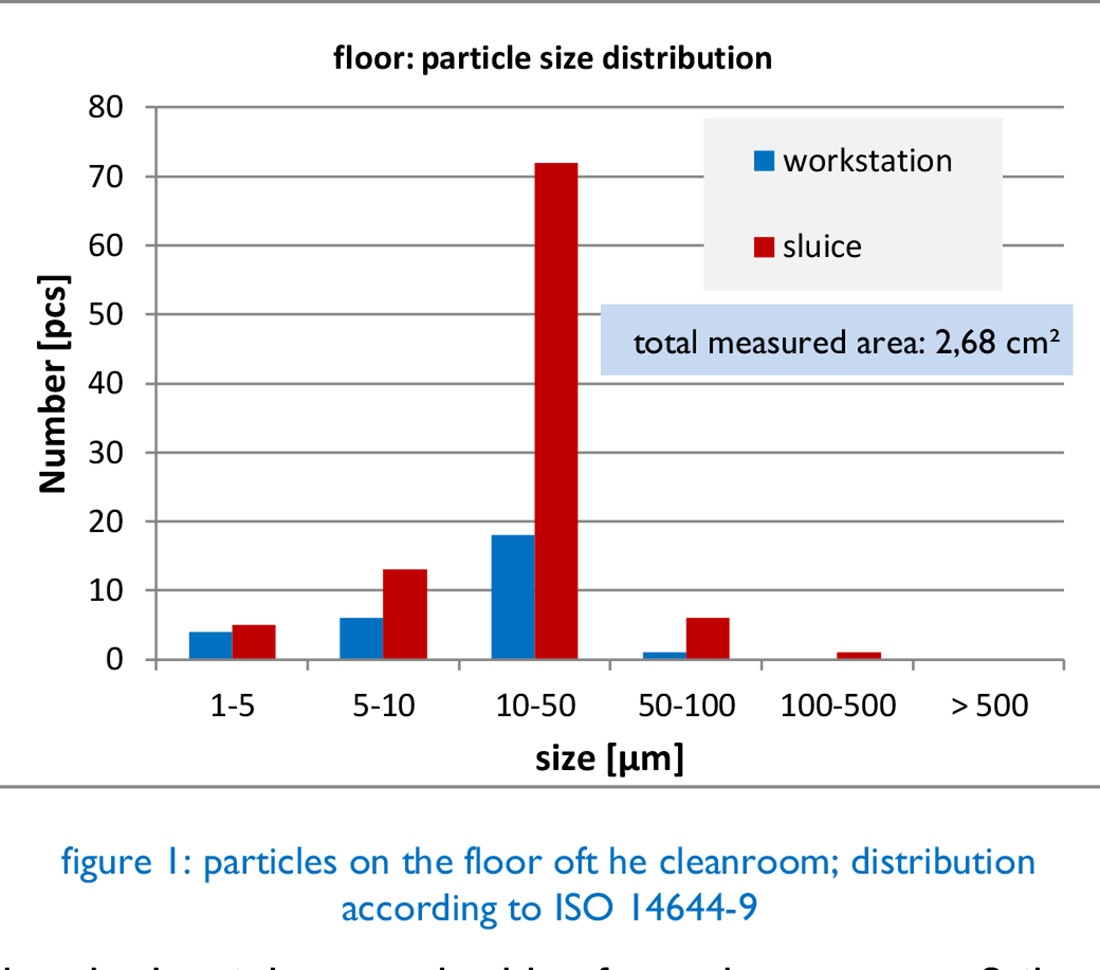
In the first test, the floor was sampled. Measuring point 1 was located directly in front of a workstation where components are measured (referred to as measuring workstation in the following). Measuring point 2 was located directly in front of the entrance to the material sluice. A sample was taken at both points using an adhesive pad (so-called TapeLift Pad). The result can be seen in figure 1 and corresponds to what was expected. More and larger particles are found on the ground in front of the sluice. Compared to the permitted limits, the measurement workstation meets SCP class 6 and the area in front of the sluice meets SCP class 7.
Next, the work surfaces were examined. These are brushed stainless steel tables from the company Sailer. These were chosen by the customer because they are characterised by very low roughness (Ra < 0.2 μm) and are therefore easy to clean. Brushed stainless steel surfaces, such as those used by Friedrich Sailer GmbH, are almost comparable with electropolished stainless steel surfaces in terms of surface roughness. These surfaces are clearly superior to ground stainless steel materials in terms of surface roughness and thus cleanability. Due to the high surface quality of Sailer stainless steel tables, direct measurement is possible with the PartSens 4.0 without the need for a Tape Lift. Minimal surface structures can be effectively suppressed by the PartSens 4.0 using the " groove mode".
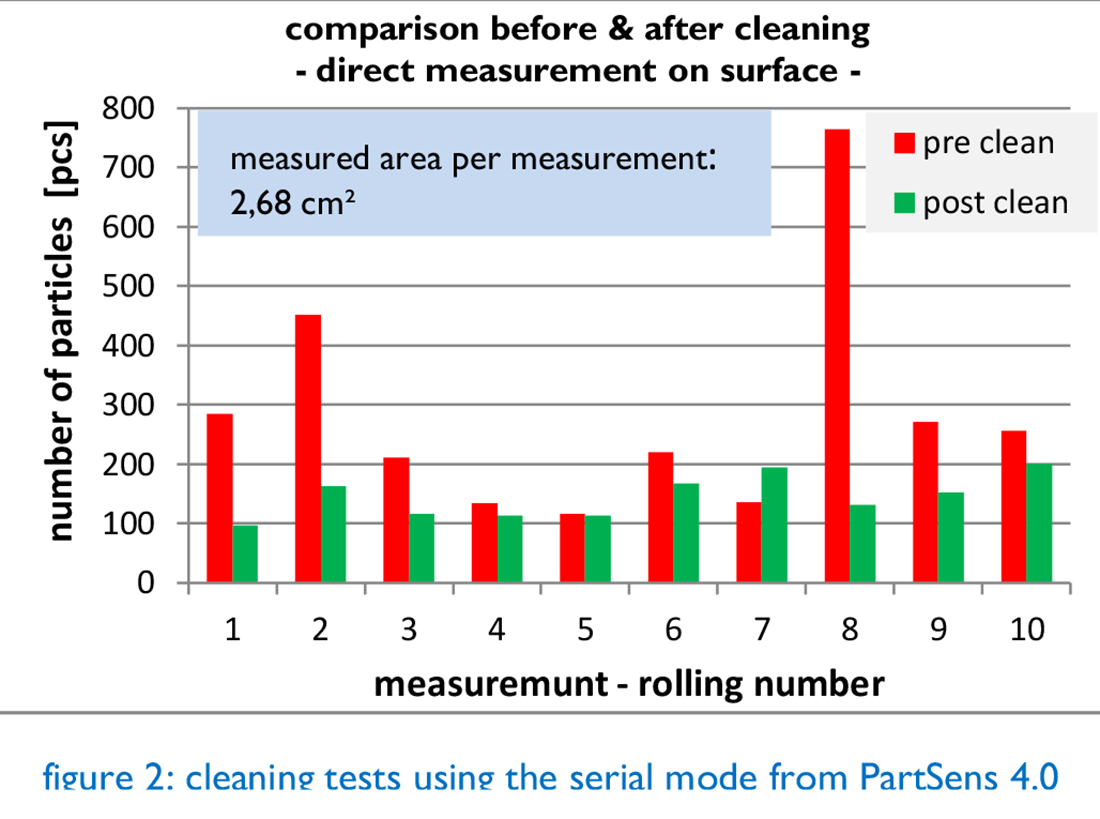
Measurements were taken at ten different locations on a frequently used work table. The table was then cleaned and measured again ten times at similar locations. With one exception, a cleaning effect is visible in all ten measurements. The measured values before and after cleaning can be seen in figure 2. Since the cleaning was very thorough, it can be assumed that the count rate after cleaning is equal to the zero count rate. For the selected measurement parameters, a zero count rate of 145 ± 36 particles per measurement was obtained.
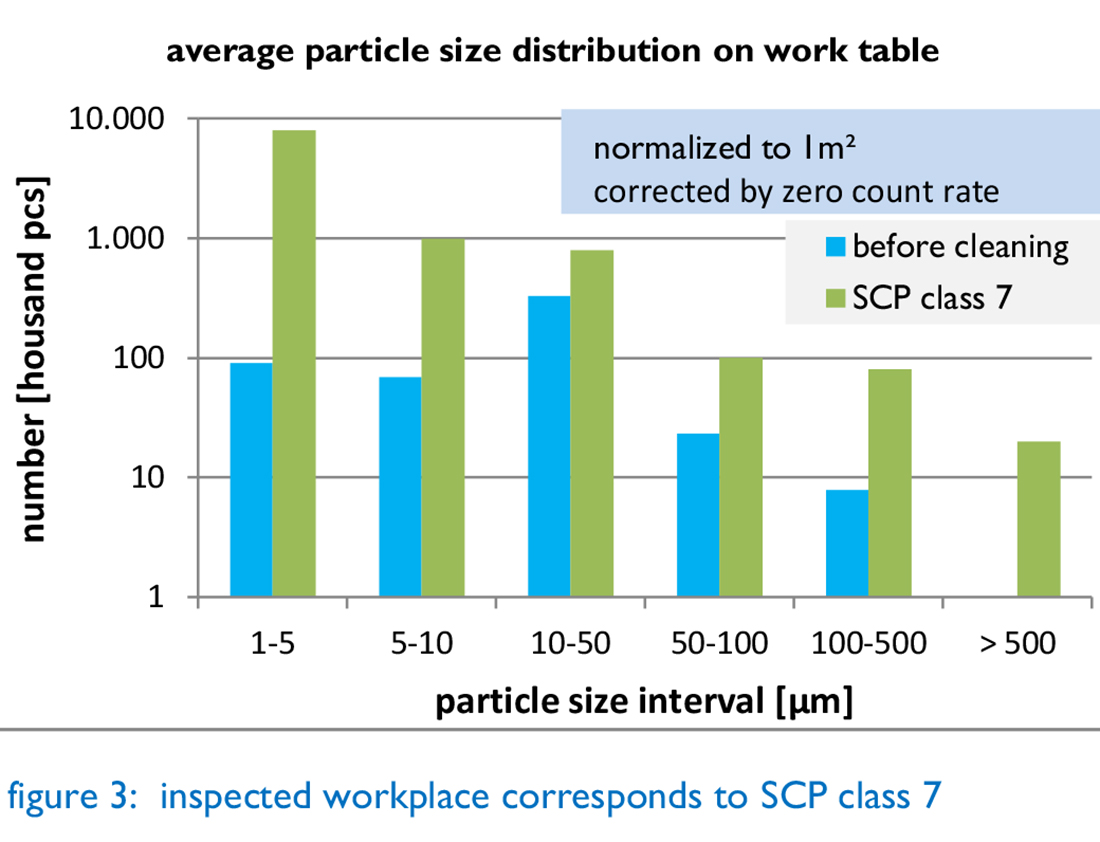
Furthermore, the zero count rate was determined for each individual measuring channel. This made it possible to correct the measurements "before cleaning" by the zero count rate. Thus, the comparison with the limit values from ISO 14644-9 is possible. In the present case, an SCP class 7 could be verified. The graphical comparison of the measured values with the ISO limit values can be seen in figure 3. The measured values in the range 1-5 μm must be viewed critically, as this is the absolute limit range of the measuring device.
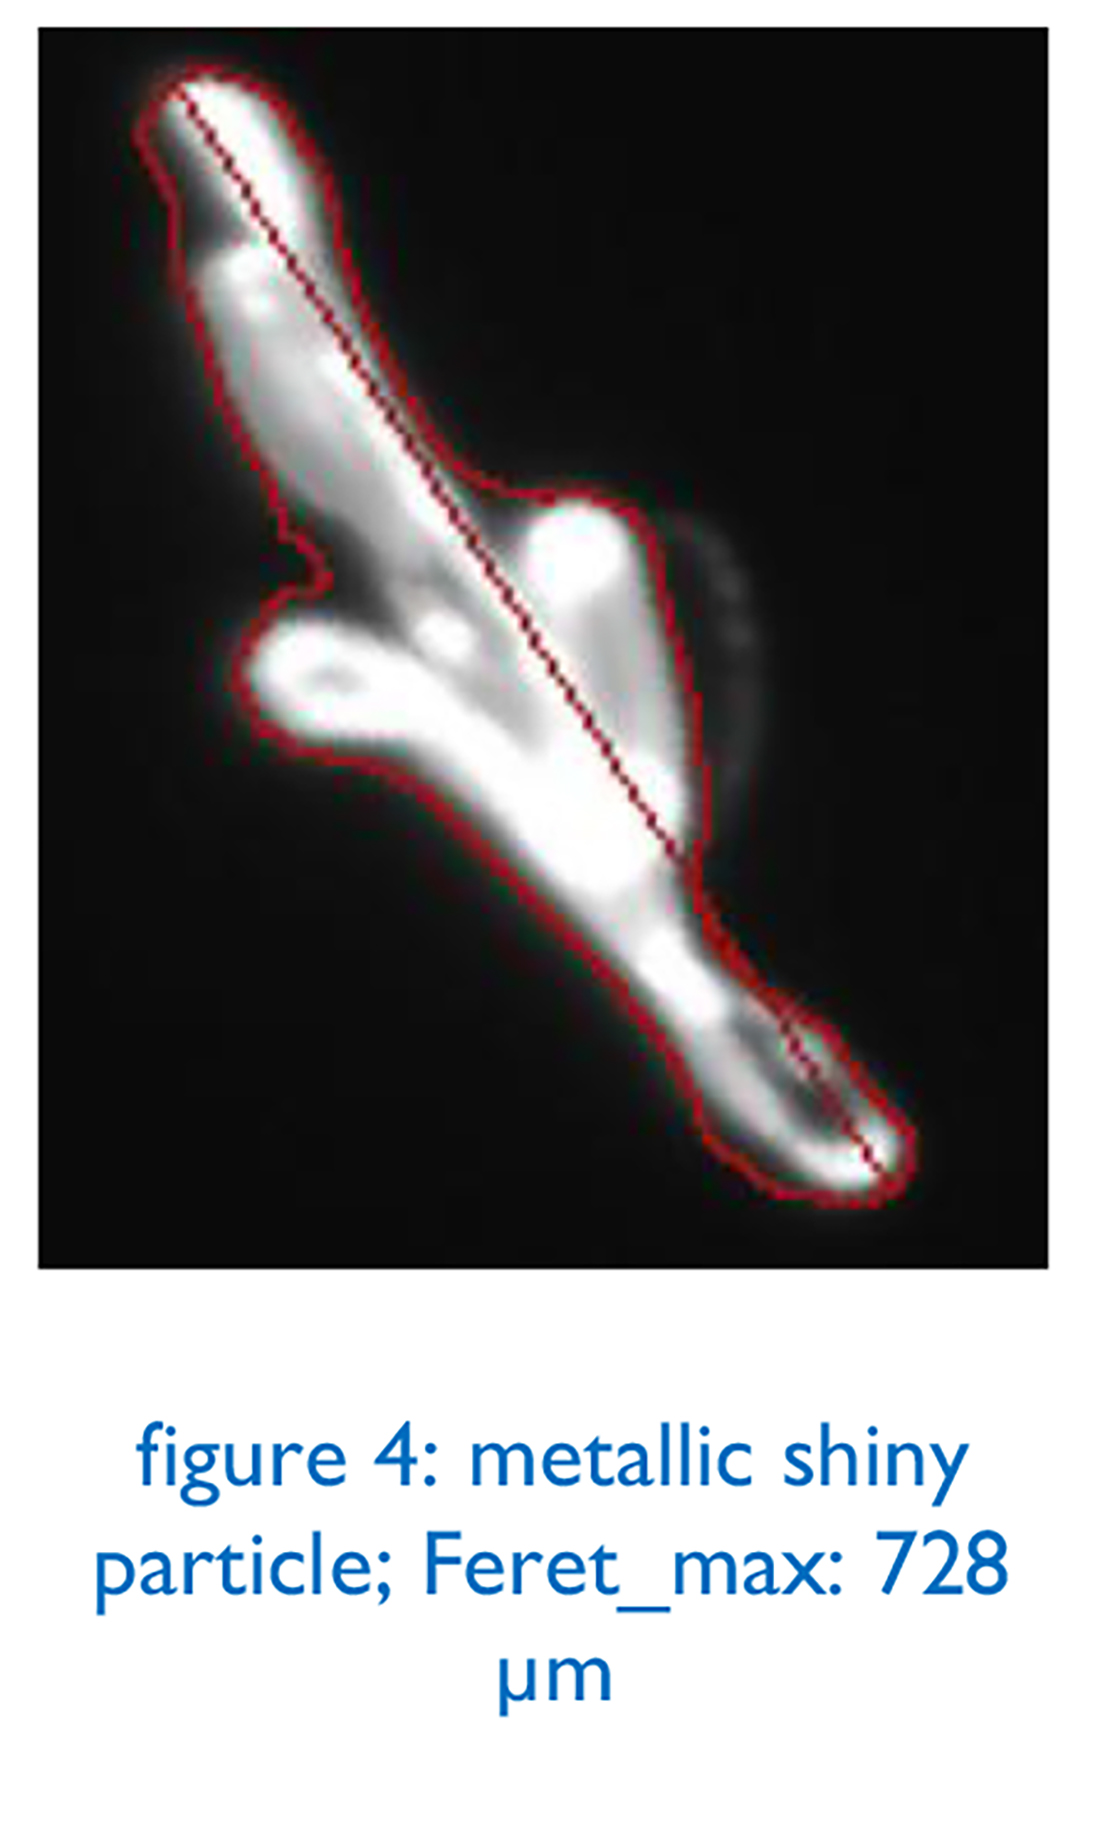
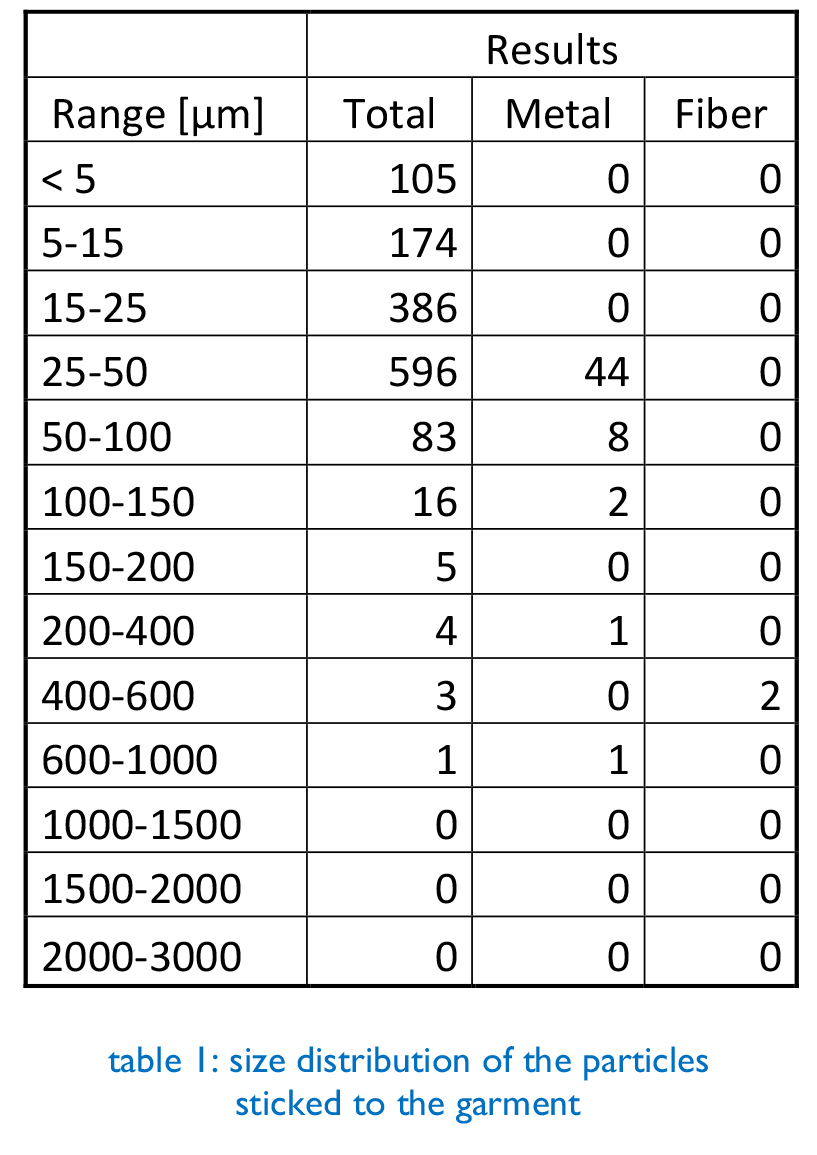
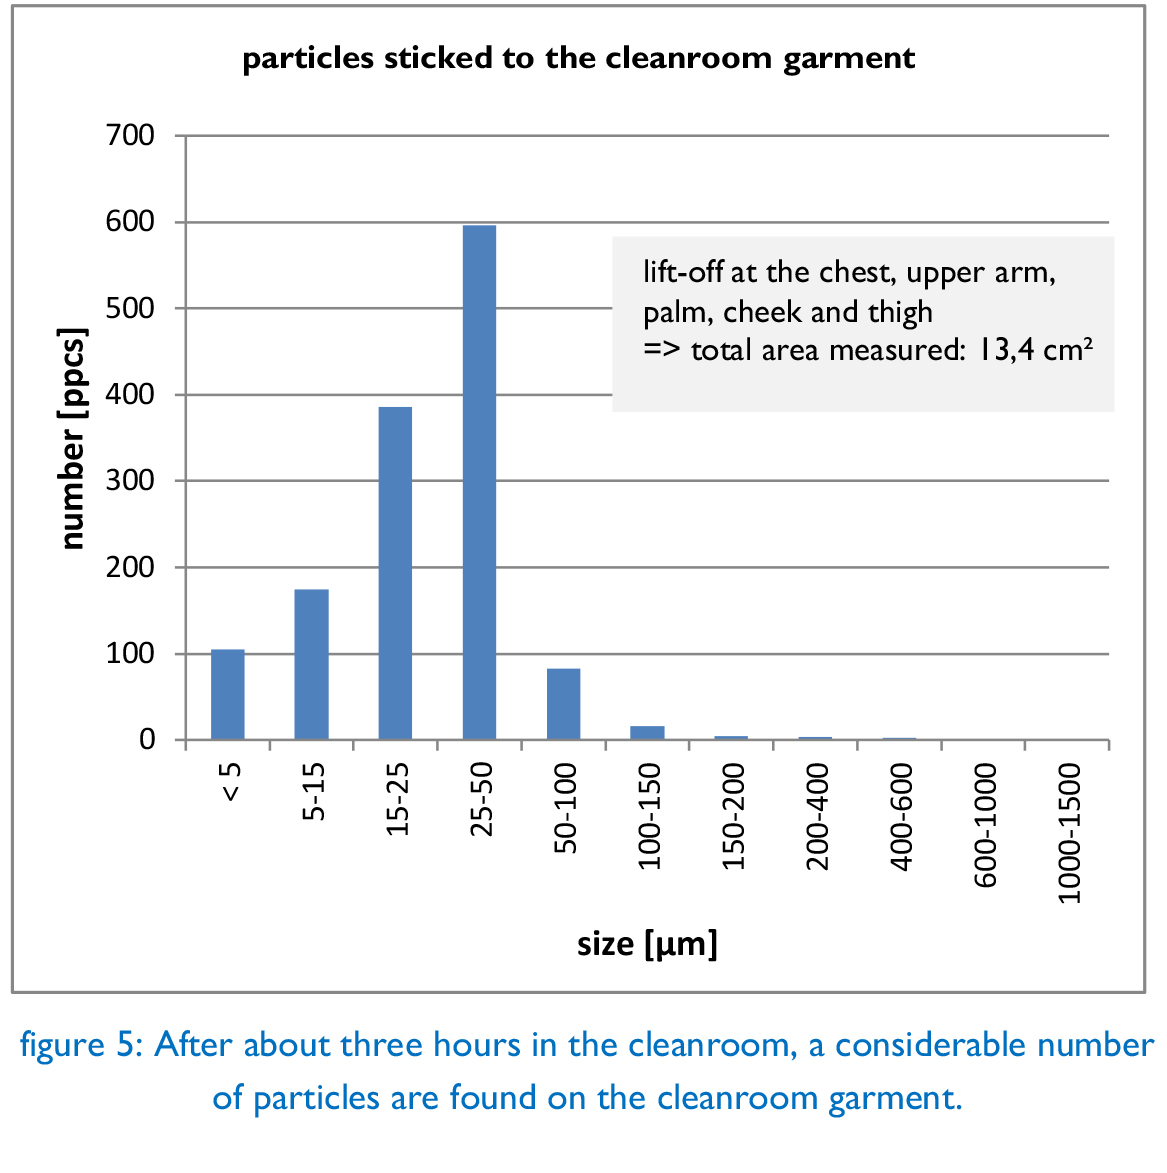
Since it is known that humans are one of the main sources of particles in the cleanroom, the cleanroom garment was sampled before leaving the cleanroom. For this purpose, a sample was taken from five locations using a TapeLift pad. The sites were the chest, upper arm, palm, cheek and thigh. The results are shown in table 1. Over 90% of the particles are smaller than 50 μm and non-metallic. Based on the number and shape of the particles, these are probably skin flakes. Furthermore, some smaller, metallic shiny particles and two fibres were found. In addition, a large shiny metallic particle in the range of 600 to 1,000 μm, which can be seen in Figure 4, was particularly conspicuous.
The complete particle size distribution of the particles distributed on the cleanroom garment is listed in numbers in table 1 and can be seen in figure 5. The distribution corresponds qualitatively to the usual observations in various measurements in other cleanrooms and underlines the relevance of ISO 14644-9. To determine the cleanliness of the cleanroom and the products produced in it, the measurement of the particulate surface cleanliness is a useful supplement to the measurement of airborne particles as described in ISO 14644-1 and -2.
![]()
PMT Partikel-Messtechnik GmbH
Schafwäsche 8
71296 Heimsheim
Germany
Phone: + 49 7033 53740
Fax: + 49 7033 537422
email: info@pmt.eu
Internet: http://www.pmt.eu

